
 German
 English
 Arabic
 French
 Italian
 Spanish (Spain)
 Thai
 Japanese
 Turkish
 Indonesian
 Vietnamese
 Polish
 Portuguese
 Malay
 Swedish
 Spanish (Mexico)
To plan a garden learning space, draw the growing beds, work area, paths, and water access together. Leave room to use each part of the garden, not just fit it onto the plan. You can build around an existing planted corner or set up a small growing area on paving.
Where To Put The Garden
Measure the usable ground and mark everything you cannot easily move: doors, gates, drains, trees, taps, and existing play equipment. Include door swings and access for maintenance. If the garden forms part of a larger yard, keep its boundary clear on your outdoor play area plan.
Visit the spot at different times of day and after rain. Add these details to your sketch:
- Sun and shade. Mark the sunny growing area separately from the shaded place where you could sit or work.
- Ground and weather. Note puddles, exposed wind, and heat reflected from walls.
- Routes. Show how you enter, bring in soil and supplies, and reach water and handwashing. Check whether watering trips would cross a riding track.
Use these observations to place the garden before choosing plants or ordering beds. The site-planning section of NC State Extension’s school garden design guide covers these practical location choices.
Check the history of the ground before using existing soil for edible planting. Before digging or fixing structures, locate underground services and get advice where work could affect tree roots or drainage.
Growing Beds, Work Space, And Seating
Give each part of the garden a clear place. You do not need a separate structure for every activity, but you do need to keep planting, messy preparation, and quieter observation from getting in each other’s way.
| Part Of Your Garden | Where To Place It | Space To Allow Around It |
|---|---|---|
| Growing beds or containers | In the light conditions required by your planting, away from running and riding routes | Access to the soil you intend to use, plus a place to stand or sit while tending it |
| Potting and sorting surface | Close to the beds, with tools nearby | Working positions beside the table and somewhere to set down pots without filling the path |
| Observation seat or small gathering spot | Within view of the planting, outside the busy work route | Space for feet, mobility aids, and adult support; a bench alone does not define the full footprint |
| Sensory planting or a small habitat feature, if wanted | Beside a place to stop and look, away from frequent disturbance | An approach that lets you observe or explore suitable plants without blocking passage or stepping into a bed |
For a small space, let one outdoor table handle potting and sorting at different times. A bench beside a planter can provide a place to pause without adding a separate seating circle. Compare the forms in the gardening tools and planters range, then keep only the pieces that serve your planned use.
You can include scent, texture, and wildlife observation without turning the whole area into a vegetable plot. Use the RHS early years garden guidance to select features for the space you have. Check plant identity, poisonous parts, and skin irritation before placing anything within reach.
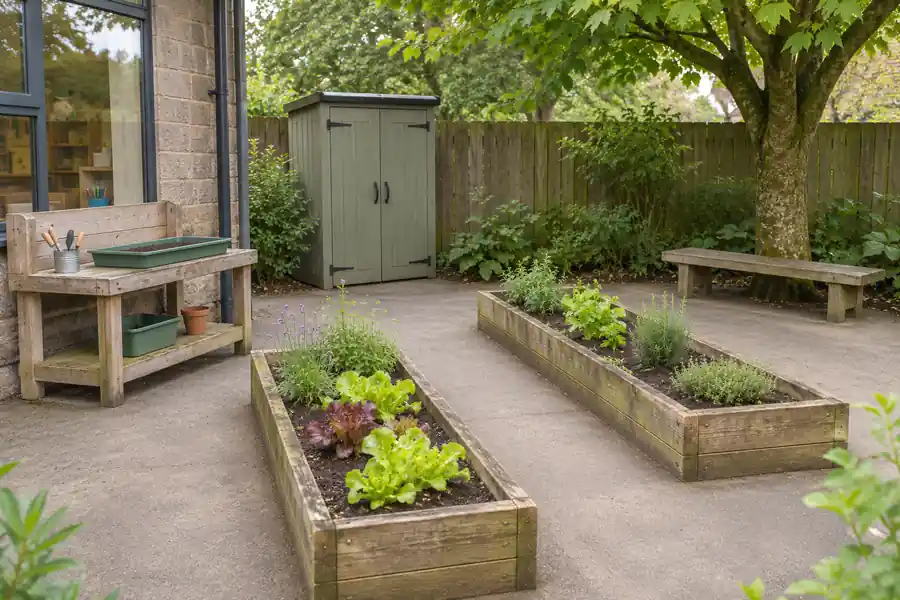
Paths And Working Positions
Draw the route through the garden before filling the remaining space. Then mark where someone will stand at a bed, sit at a table, or open a cupboard. If those positions fill the route, move a unit or reduce its size.
Allow space to turn and pass as well as move straight ahead. Check the route with the mobility aids and equipment you expect to use. Avoid a narrow dead end behind a planter. For surface and access considerations, use the KidsGardening guide to accessible garden paths; confirm dimensions and requirements for your own site and country.
Keep tall planting and storage where you can still see the working areas. Show the expected mature spread of shrubs and climbers on the sketch. A clear route on installation day can become crowded once plants grow over its edges.
A Small Garden Learning Space Layout
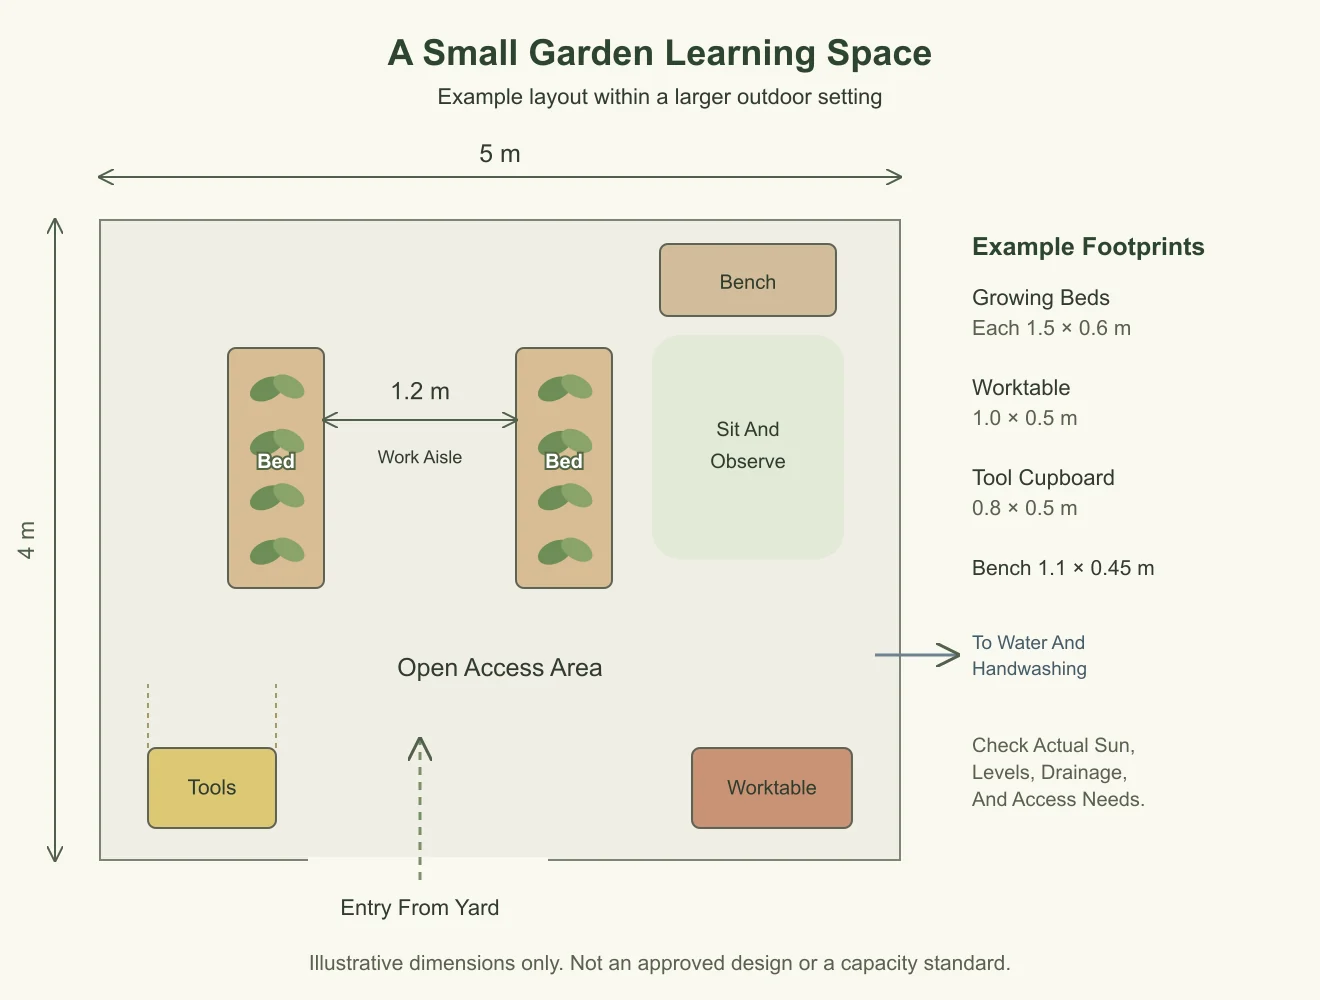
Use this example to see how the parts fit together. It shows a 5 m by 4 m garden area within a larger outdoor setting, with entry from the bottom of the drawing. It is an illustrative arrangement, not a licensed outdoor-space allowance, capacity calculation, or approved construction plan.
| Item In The Example | Example Footprint | How It Is Arranged |
|---|---|---|
| Two growing beds | Each 1.5 m long by 0.6 m wide | Parallel beds, with access along both long sides |
| Space between the beds | 1.2 m | A working aisle connected to the larger open area below |
| Potting table | 1.0 m by 0.5 m | Beside the open area, rather than between the beds |
| Tool cupboard | 0.8 m by 0.5 m | Near the entrance, with opening space in front |
| Observation bench | 1.1 m by 0.45 m | At the side, facing an open sitting area |
The bed spacing here is an example, not a minimum access standard. With someone working on each side of the aisle, you may need more width for passing. Widen the gap or stagger use if this must also stay open as a through-route. Include the actual gate, water point, ground levels, and required access clearances when adapting the drawing.
Keep the open area available for approaching the table, turning, and bringing in materials. Adapt the arrangement to your site:
- A smaller plot. Remove a bed before squeezing the same set of items into narrower gaps. Avoid filling useful open space with extra pots.
- A long, narrow site. Place shallow planters along one side and keep the work surface at the wider end.
- A shared paved area. Use suitable freestanding containers and agree where each unit stays during other activities. Check filled weight before treating a planter as movable.
Choosing Planters And Work Surfaces
Once the arrangement works, compare the dimensions that affect use. The outside size alone will not tell you how much soil fits, whether the centre is reachable, or whether a seated user can get close enough.
Bed Width And Working Height
Check bed width from the sides you can actually use. KidsGardening suggests roughly two to three feet, about 60–90 cm, for very young children. Use that as a starting point for checking reach, not a fixed age standard. A bed against a wall may need to be shallower because you cannot approach from behind.
Check these dimensions before ordering:
- Working height. Ask for the height of the working edge and soil surface. An overall catalogue height may include a trellis or back panel.
- Seated access. Check the opening underneath, knee space, and reach with the actual user. A shelf or crossbar can prevent a close approach even when the top height looks suitable.
- Soil depth. Match it to the roots of your selected plants. A shallow activity tray may suit handling materials but not long-term growing.
Mark the footprint on the ground and mock up the working edge before ordering several units. Include the rim width in the reach check.
Soil Contact And Outdoor Use
Confirm what supports the filled planter, where excess water leaves it, and how you can inspect or replace a liner. Keep drainage openings clear rather than sealing the bottom to protect the timber. Check the full loaded weight before placing a raised unit on decking or another structure.
For edible planting, ask specifically about wood treatment, coating, liners, and soil contact. A product described as weather-resistant is not automatically suitable for growing food. The USDA school garden guidance addresses container and bed materials; apply your local requirements as well.
For tables and benches, compare rain exposure, joints, feet, and upkeep using the outdoor furniture materials guide. Keep the finish and colour choices until after you have confirmed the working sizes and intended use.
Water, Drainage, And Tool Storage
Put these on the plan before installation. A garden needs a practical place to fill a can, somewhere for water to go, and storage that supports the work without taking over the growing area.
A Water Point You Can Use
- Filling a can. Check that you can fill a small watering can without lifting it over a high rim or carrying it through another activity.
- Hose storage. Keep the hose off the path when it is not in use.
- A new tap or sink. Have the supply, controls, and wastewater arrangement designed for the intended use.
Plan handwashing separately from watering. A hose connection or a play sink does not automatically provide a suitable handwashing facility. If you already have a Matschküche, keep its pretend cooking equipment separate from anything used to wash or prepare harvested food.
Where The Water Goes
Check both drainage from the planter and runoff across the ground. A planter with drain holes can still leave a slippery puddle on paving. Keep outlets away from the main walking line and arrange suitable drainage with your site contractor.
Do not place a bed over an inspection cover or block an existing drain with a cupboard. The RHS drainage guidance explains why persistent waterlogging needs attention; raising the planting alone does not resolve a wet access route.
Storage Beside The Work Area
Size storage around your watering cans, trays, spare pots, tools, and growing mix:
- Usable space. Check the opening and shelf height, including handles and loaded trays.
- Drying and storage conditions. Allow tools to dry before closing them away. Store growing mix as directed on its packaging.
- Restricted items. Keep sharp tools and garden chemicals locked away from the supervised tool supply.
- Location. On a tight site, a smaller cupboard beside the worktable may be more useful than a large shed across the garden.
Budget for ground preparation, drainage, water access, and installation before adding optional structures. You can add another planting bed later; moving a finished bed to repair the ground beneath it is much harder.
FAQs
- Can You Build A Garden In Rented Premises?
Get written agreement for digging, fixings, plumbing, and any change to the ground surface. Clarify what must be removed or restored when the lease ends. Include those conditions in your choice between permanent beds and removable containers.
- Does The Garden Need Its Own Fence?
Check the purpose of the boundary and your local rules before adding one. You may need controlled access in some settings, while an extra enclosure elsewhere could add gates and reduce usable space. Do not assume a garden fence replaces the required boundary for the whole outdoor area.
- Can You Add A Compost Bin?
Only include one if you have room and a clear plan for suitable contents, pests, hygiene, and ongoing care. Choose its location for servicing as well as supervised use. Follow local early-childhood and food-growing guidance rather than treating it as an essential garden feature.
- Can You Install The Garden While The Setting Is Open?
Arrange a separate work area and delivery route with your installer. Keep tools, materials, and unfinished work inaccessible to children, and agree when the area can return to use. If you cannot separate the work reliably, schedule it outside opening hours.
- Should You Add A Greenhouse?
Only if you have a growing need that justifies the space and can manage ventilation, heat, access, and maintenance. A small cover can still overheat. Leave it out of the first plan if open growing beds will meet your needs.
Abschluss
Use your site sketch to compare arrangements before committing to products. If you need help matching planters, worktables, and storage to the available ground, Xiair Welt can review the options with your measurements.