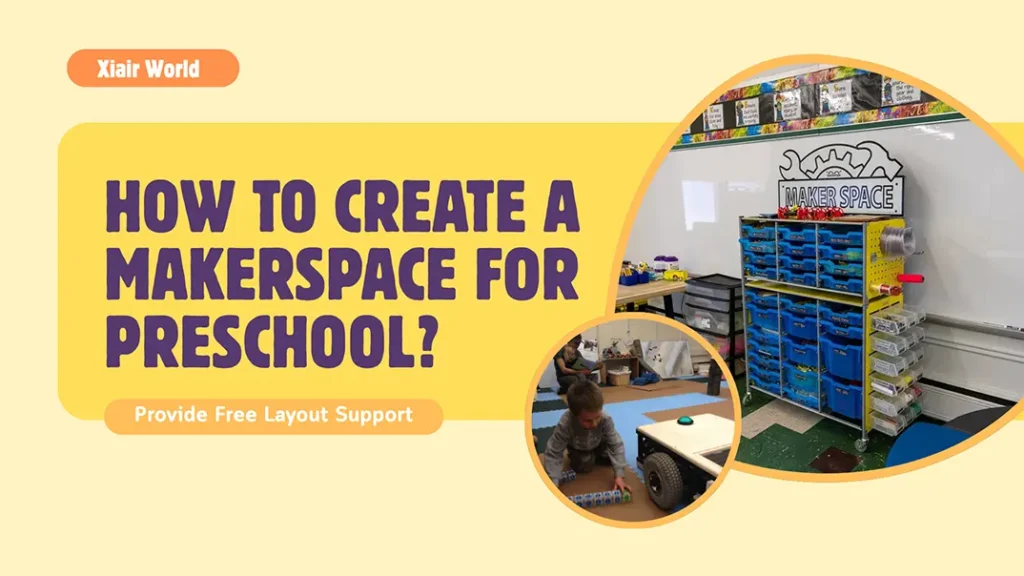
To create a makerspace for preschool, start by defining clear goals and choosing a space that is easy to supervise. From there, organize the area with child-sized furniture, visible storage, and simple tools that help children use the space safely and independently. Gradually add age-appropriate materials that invite building, testing, and open-ended exploration.
Kevin Jarrett put it, “A true makerspace is defined not by what’s in it but rather by what comes out of it.” Schools do not need a room filled with impressive equipment. They need a space children can actually use, where simple materials lead to thinking, testing, and learning.
This is where many early learning centers get stuck. They want a makerspace that feels creative and open; they also need it to fit a real classroom and routine. Read on to explore our experience and discover how an effective makerspace takes shape in a real preschool setting.
What Is a Makerspace?
A makerspace is a place where children use materials, tools, and their own ideas to build, test, explore, and solve problems through hands-on work.
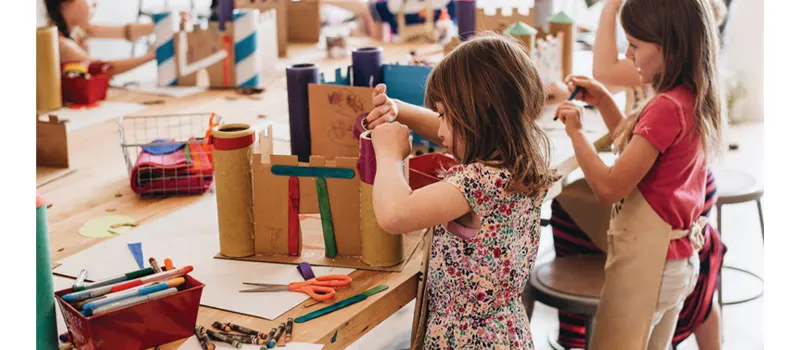
That sounds simple, and in many ways it is. A makerspace is not defined by a 3D printer, a laser cutter, or a room full of expensive equipment. In preschool, it may be only about cardboard, tape, wood offcuts, fabric, bottle caps, and a table, but children have enough space to try something out.
What makes it a makerspace is the way the space works. Students are there to figure things out. They build something, notice a problem, change it, and try again. Sometimes the result looks impressive. Sometimes it falls apart. Both are part of the point.
What Is Making, and Who Is a Maker?
NAEYC makes a helpful distinction here. It describes tinkering as open-ended exploration with materials, making as creating something from an idea, and engineering as adding constraints so that what is made solves a problem or does a specific job.

That distinction matters in preschool because adults often lump everything together. A child taping cardboard pieces just to see what happens is tinkering. A child deciding to turn that cardboard into a garage for toy cars is making. A child adjusting the height so the cars can actually roll through is moving into engineering. The materials may look simple from the outside, but the thinking behind them is not.
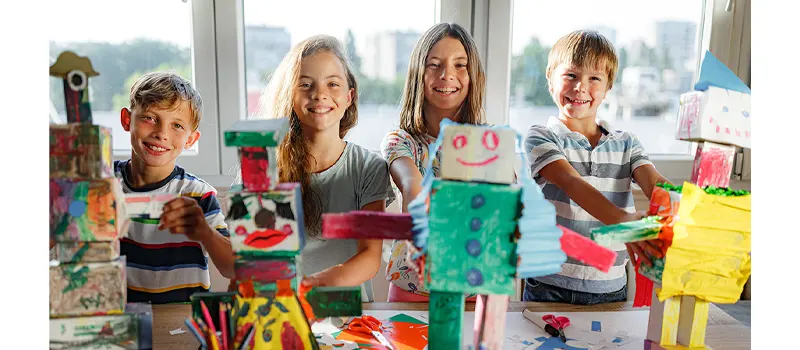
So who is a maker? Actually, children are natural makers. In a preschool classroom, a maker is not the child with the most advanced tools or the neatest final result. The moment a child starts imagining, building, testing, changing, or creating something with purpose, making has already begun.
That is also why preschool makerspaces do not need to feel high-tech to be valid. Once children are given room to experiment, they begin doing what makers do naturally. They test, adjust, invent, and try again.
Why It Matters to Create a Makerspace for Preschool?
Makerspace gives young children a place to explore ideas. In many classrooms, hands-on learning is valued in theory but limited in practice. A makerspace makes that kind of learning easier to support. It helps children become more independent, gives teachers a better view of how children think, and makes better use of everyday materials that might otherwise be underused.
- Supports hands-on learning in a consistent way
- Strengthens problem-solving and early critical thinking
- Encourages independence and decision-making
- Builds persistence and confidence through trial and error
- Supports social-emotional learning through collaboration, negotiation, and shared work
- Creates more opportunities for language development and meaningful conversation
- Makes open-ended materials more useful and purposeful
- Helps teachers observe children’s thinking, interests, and learning behaviors more clearly
- Reduces reliance on product-driven or overly directed activities
- Strengthens program appeal for prospective families
Set Your Goals and Budget Before You Buy Anything
Before buying anything, stop to ask a more basic question: what do you actually want this makerspace to do? Without clear goals, it is easy to spend too much on the wrong things or fill the space with materials that do not get used well.
Start by thinking about the purpose of the space.
- Do you have room for a full area, a small corner, or a mobile setup?
- What kind of making the space will support?
- How many children will use it at one time?
- How often will it be used?
Once the goal is clear, set a budget based on essentials first. Focus on the basic items that make the space usable, such as work surfaces, storage, and a manageable starter set of materials. It is better to begin with a simple setup. A flexible budget makes it easier to expand in the right direction later.
Setting up the Makerspace
In an effective Makerspace, children should be able to reach materials, start work, and return to projects without too much confusion. Teachers should be able to supervise the area, reset it efficiently, and keep it functional from one day to the next.
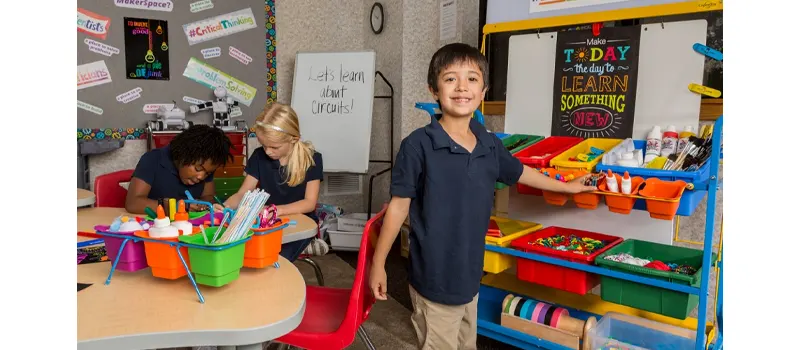
Choose a Location That Supports Daily Use
Preschool makerspace should be located in a space where easy to supervise and access. It should also be placed away from busy walkways, doorways, or areas that are constantly interrupted. Too much traffic can make it harder for children to stay focused and harder for teachers to manage the space smoothly.
Create Clear Working Zones
The makerspace should be planned according to the space you truly have. For a larger makerspace or a dedicated room, you can organize the space into more defined zones. We have adopted zoning like this in real projects:
- Main Work Area: tables or floor space where children build, assemble, and create
- Materials & Loose Parts Area: open shelving with categorized materials for easy access
- Tools Station: a controlled area for tools and specific equipment
- Project Storage Area: trays or shelves for unfinished work
- Cleaning & Reset Area: a small space with bins or access to cleaning tools for quick reset
- Display Area: a wall, shelf, or board to show finished work or ongoing projects
- Planning or Discussion Spot: a small rug or seating area for sharing ideas and group thinking
A classroom corner needs clearer boundaries and tighter organization so the area does not blend into the rest of the classroom. A cart or cabinet-based setup needs to stay compact, simple, and easy to reset, with only the most useful materials kept accessible at one time.
Even a small makerspace should have a basic internal structure. Children need to understand where to work, where to find materials, where tools belong, and where unfinished projects should go. These zones do not need to be large or formal, but they should be clear enough that children can use the space with less adult direction. When the layout is easy to understand, the space becomes easier to manage and more likely to support independent use.
Leave Enough Room for Movement
Preschool making involves more movement. Children carry materials, turn projects, test ideas, and often work beside each other at the same time. If tables are too close together or shelves block the path, the space quickly starts to feel frustrating. A good layout leaves enough room for children to move safely, share space comfortably, and carry materials between storage and work areas without confusion.
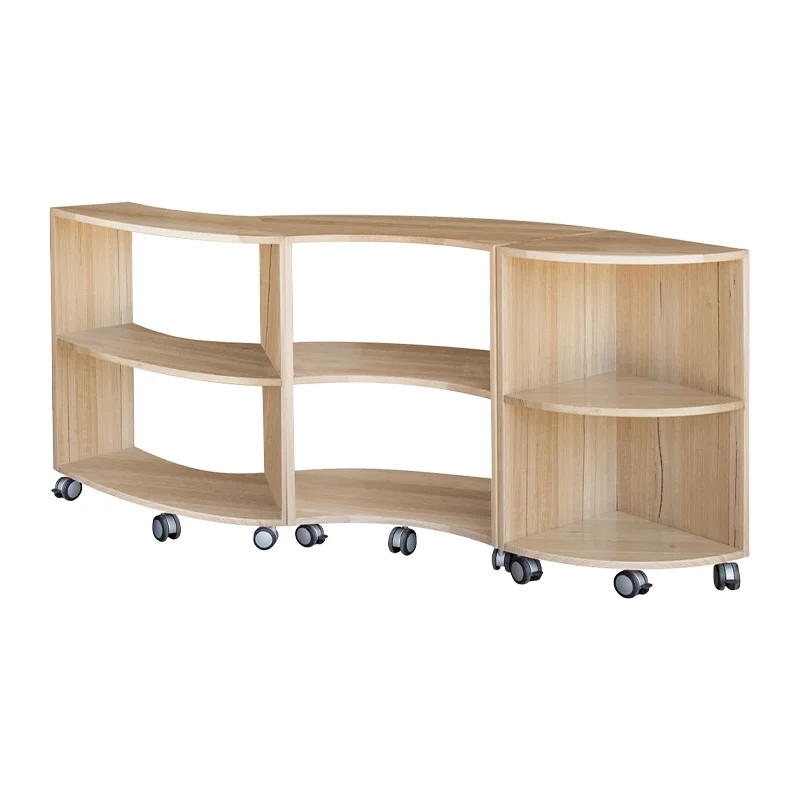
Use Furniture That Supports Access and Flexibility
Child-height tables, open shelving, and easy-to-reach containers usually work best because they support independence and make materials more visible. Low shelves can also help define the edge of the makerspace without closing it off completely. In smaller classrooms, mobile furniture is stable, practical, and easy for teachers to manage as part of the daily routine. Rugs are also a useful choice; we usually use them to mark boundaries or create a floor-based activity area.
Plan for Unfinished Work and Material Handling
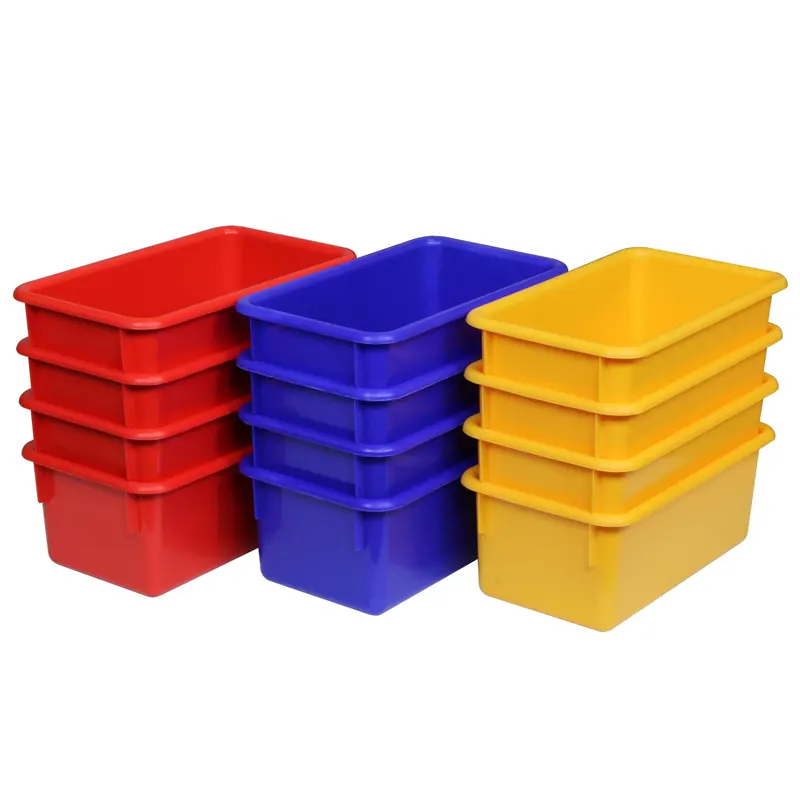
A makerspace needs more than basic storage. Children also need a clear way to sort materials, collect parts, and save work that is not finished yet. Without a plan for work in progress, projects tend to get mixed up, packed away too quickly, or spread across the room. Simple solutions such as trays, bins, baskets, and shallow containers make a big difference because they help children manage materials more independently and help teachers keep the area organized over time.
Keep the Setup Simple and Visually Clear
A preschool makerspace should not feel crowded from the first day. A simpler setup makes it easier for children to see what is available, understand what the area is for, and focus on their work. It also helps teachers notice what is being used well and what needs to be adjusted after the space is in real use.
Gather Materials and Tools
Materials and tools should be open-ended, safe, and easy for young children to use independently. Don’t collect too many supplies. Build a practical mix that supports building, designing, testing, and creative problem-solving.
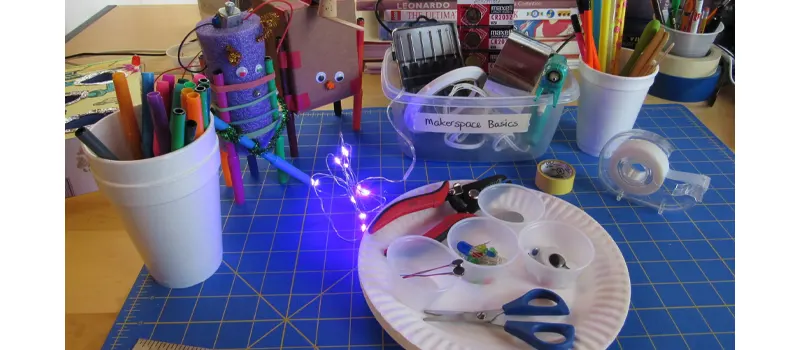
Starter Materials
The first materials should be simple, flexible, and easy for children to use in different ways. Good starter materials usually include cardboard, paper tubes, masking tape, painter’s tape, child-safe scissors, glue sticks, fabric pieces, string, bottle caps, craft sticks, corks, and a small mix of loose parts. They give teachers a chance to observe how children approach making before the space becomes too full or too complicated.
Upgraded Materials
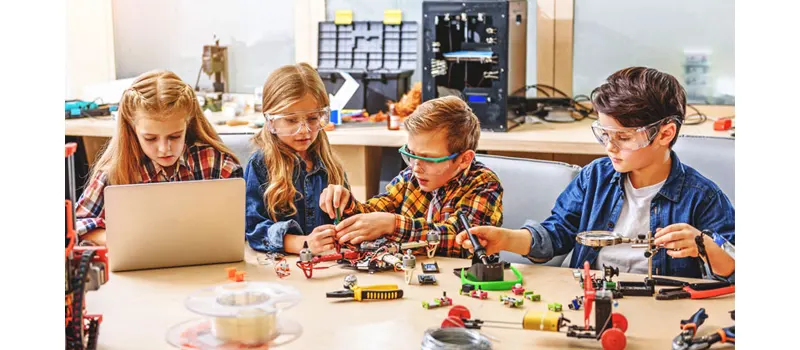
Once the makerspace is being used regularly, it becomes easier to see what is worth adding. Upgraded materials should help children work in more detailed ways, stay with projects longer, and test ideas with better control. This may include sturdier connectors, hole punches, measuring tapes, tweezers, clips, Velcro dots, foam board, translucent materials, stronger trays, simple STEM materials, or light woodworking pieces.
Hot glue can also be introduced in some preschool makerspaces, but it should be used carefully and always with adult supervision. Low-temperature glue guns are usually a safer option when stronger connections are needed for certain projects. In most cases, hot glue works best as a teacher-assisted tool rather than something children use independently.
Free Recycled Materials
Some of the most useful makerspace materials cost nothing at all. Clean recycled materials often give children more freedom than ready-made kits because they do not suggest only one outcome. Boxes, lids, cartons, paper rolls, bottle caps, yogurt cups, egg cartons, fabric scraps, ribbons, packing paper, and safe packaging pieces can all become part of everyday making. But the key is to choose recycled items that are clean, safe, and practical to store, so they support making instead of creating clutter.
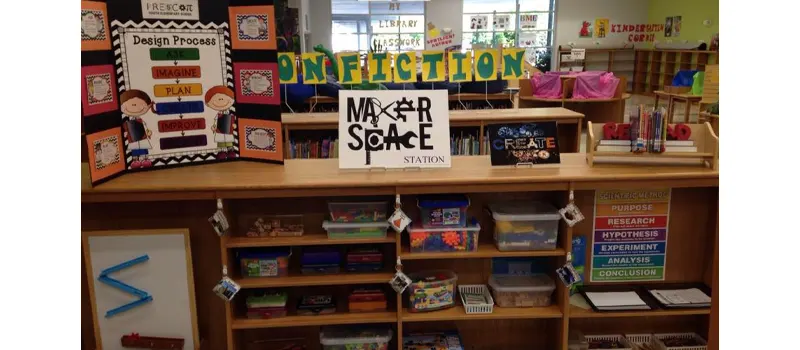
Organization and Displays
Organization and display are part of the space teaching. Children work more independently when materials are easy to find, return, and presented in a way they can understand. Displays help children revisit ideas, value their work, and make the makerspace active. A good system should make the space easier to use, easier to maintain, and more meaningful over time.
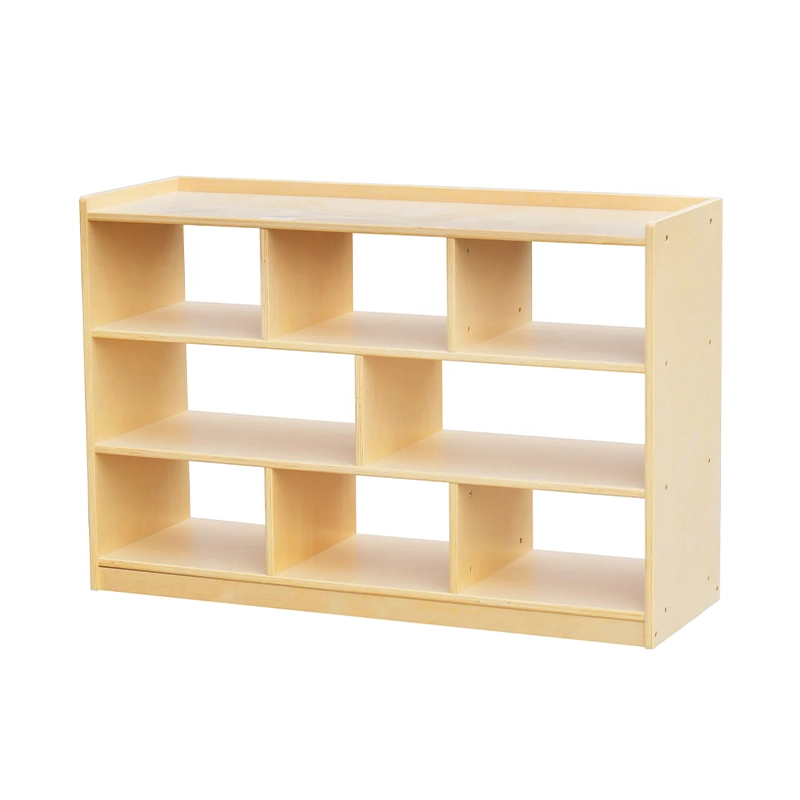
Organize Materials in a Way Children Can Read
Materials should be grouped simply and predictably. Clear bins, shallow trays, open baskets, and low shelves usually work better because children can see what is available at a glance. It is also helpful to separate materials by type or function, such as building materials, fastening materials, loose parts, or tools, so the space feels easier to understand and manage.
Keep Everyday Materials Visible and Extra Materials Stored Away
Not everything needs to be out at the same time. Put useful materials visible and easy to reach, while backup materials or less frequently used items are stored separately. This keeps the space from looking crowded and helps children focus on making rather than sorting through too many choices. Rotation can also keep the area fresh without requiring a full reset.


Make Cleanup and Reset Part of the System
A makerspace is easier to maintain when the organizational system also supports cleanup. Children should be able to tell where materials belong, where unfinished work goes, and what needs to be cleared at the end of an activity. When trays, baskets, shelves, and work-in-progress storage are clearly assigned, cleanup becomes faster.
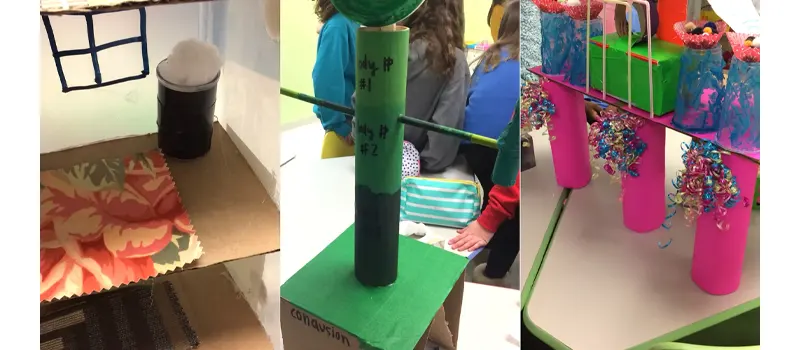
Use Displays to Show Process, Not Just Finished Work
In a preschool makerspace, it is often more meaningful to show the process of making, such as sketches, photos, unfinished builds, material choices, or different versions of a project. This helps children remember what they tried, notice how ideas change, and feel that their effort matters, not just the final product. It also gives teachers a way to make learning visible. Don’t need to turn the space into a formal exhibition area.
Create Display Areas Connected to the Space
A small shelf, pinboard, wall strip, tabletop display, or photo area near the makerspace is enough. In larger spaces, you may also want a dedicated display section for current projects or collaborative work. The goal is to give children a clear place where ideas, works in progress, and finished creations can be noticed and revisited.
Keep the Visual Message Clear
A preschool makerspace should not feel visually overloaded. Too many labels, too many posters, or too many displayed items can make the area harder to read and less inviting to use. A smaller number of clearly presented materials and purposeful displays usually works better than trying to show everything at once.
Balance Rules and Freedom
Keeping expectations simple and clear while allowing children to make their own choices within that structure. Instead of controlling every action, focus on a few essential rules for safety, material use, and cleanup, then give children the freedom to decide what to build, how to use materials, and how long to stay with a project.
Keep Rules Clear and Minimal
Instead of creating a long list of rules, focus on a few expectations that children can remember and follow. Most preschool makerspaces only need simple guidelines, such as using materials safely, sharing space with others, and returning items after use. When rules are short and consistent, children are more likely to understand and apply them during real work.
Teach How to Use Materials
Rules are effective when children understand how to use materials properly. Show children how to cut, connect, carry, and store materials in a safe and practical way. When children know how to use tools and materials, they need fewer reminders and can work more independently.
Guide the Process Without Taking Over
Children need support, but not constant correction. If the teacher steps in too quickly, the space starts to feel like another teacher-led activity. Good guidance usually sounds simple: a question, a reminder, or a small suggestion that helps the child keep going without taking the problem away from them.
Use the Environment to Support Behavior
The setup of the space can reduce the need for constant rule reminders. When materials are organized clearly, tools have a defined place, and work areas are easy to understand, children are more likely to use the space appropriately.
Adjust Rules as Children Learn
Rules do not need to stay fixed. As children become more confident and responsible, you can gradually introduce more materials, tools, or flexibility in how the space is used. In the same way, if something is not working, it is often better to adjust the setup or expectations rather than simply adding more rules.
How to Invite Preschoolers to Make?
A good way to invite preschoolers to make is to begin with a setup that feels easy to join. We usually find it helpful to prepare just a few materials, place them neatly in the space, and give children a simple prompt or idea to start from. Once the entry point is clear, children are more willing to come over, touch the materials, try something out, and gradually develop their own ideas through the process.
Keep the Entry Point Easy Every Day
The space should feel open enough that children can return to it regularly. When the entry point is simple, making becomes part of the classroom rhythm.
Start with Simple Invitations
A few materials placed together with a clear possibility can invite action more effectively. For example, cardboard, tape, and toy animals can suggest building a shelter. Tubes and balls can suggest making a path or ramp. The goal make it easy for children to start.
Use Questions Instead of Directions
Give them something to think about, such as “What could you build with this?” or “How can you make this stand?” Keep the activity open while still giving it direction. This approach supports making without turning it into a step-by-step task.
Let Materials Lead the Interest
In many cases, children become engaged because of what they see and touch. Rotating materials, changing combinations, or adding one new element can refresh the space without redesigning everything. A new type of connector or a different material can shift how children approach the same area.
Begin with Small Groups
Introducing the makerspace to a few children at a time. Small groups make it easier to model how the space works, observe how children use materials, and adjust the setup if needed. Once routines are clear, the space can be used more independently.
Allow Time to Explore Without Pressure
Not every child will begin building right away. Some will watch, touch materials, or move items around before starting. That early exploration is part of the process. Don’t bore them, just observing.
Recognize and Extend What Children Start
When a child begins to make something, even in a simple way, that moment matters. A short comment or question can help extend the idea. For example, noticing how a child connects materials or asking what they want to try next keeps the focus on the child’s thinking.
Final Thinking
A preschool makerspace is easy to overthink and just as easy to get wrong. It is tempting to focus on what to buy, how it should look, or how closely it matches what other schools are doing. In practice, those things matter much less than whether the space actually works for the children and teachers using it every day.
The makerspaces that last are usually the ones that start small, stay simple, and grow from real use. They are not built all at once. They are adjusted, tested, and refined as children begin to work in them. Over time, what looks like a basic setup often becomes one of the most active and meaningful areas in the classroom.
Remember, creating a preschool makerspace is not building something impressive. It is about creating a place where children can take an idea and do something with it, and come back to it again. When that happens consistently, the space is doing exactly what it is meant to do.
Domande frequenti
How to set up a makerspace in a small classroom?
In a small classroom, a makerspace can be set up in a corner, along a wall, or using a mobile cart. The key is to keep the setup simple, define clear boundaries, and organize materials so children can access and return them easily without disrupting the rest of the classroom.
Can you help plan and set up the makerspace?
Yes, we can support the full setup process. Based on your classroom size, number of children, and age group, we can suggest a suitable layout, define activity zones, recommend the right furniture and materials, and help you build a makerspace that is easy to use and manage from the start.
How can you create a makerspace on a small budget?
Start with a basic workspace, simple storage, and open-ended materials such as cardboard, paper tubes, tape, fabric scraps, bottle caps, and other clean recycled items. Many effective makerspaces grow gradually over time, with new tools and materials added only after teachers see how children are actually using the space.
How can I make sure students are learning and not just wasting supplies?
You can find children are learning when they are testing ideas, making changes, solving small problems, combining materials intentionally, or returning to improve their work. The best way to reduce wasted supplies is to offer a manageable amount of materials, teach children how to use and return them, and observe how they work before adding more.
What age is appropriate for a makerspace?
A makerspace can be appropriate for preschool children as long as the space, materials, and tools match their developmental stage. The key is not choosing one “right” age, but adjusting the setup so it fits the abilities and working habits of the children using it.