
 Spanish (Spain)
 English
 Arabic
 French
 Italian
 German
 Thai
 Japanese
 Turkish
 Indonesian
 Vietnamese
 Polish
 Portuguese
 Malay
 Swedish
 Spanish (Mexico)

Classroom decoration ideas are most useful when you can picture how they will work in your own room. A display might help children recognize their belongings, revisit a piece of work, or find something to talk about. It can also make an ordinary corner feel more inviting.
For preschool and early childhood classrooms, the challenge is choosing what deserves space. The ideas below focus on displays, labels, color, and small decorative details you can use in an existing classroom.
Before You Add Anything To The Walls
Look at the room from a child’s height, including from a chair or the floor. Notice which displays are easy to see and which disappear behind furniture. A board that looks clear from the doorway may be difficult to read from the place where children actually sit.
Give each display a purpose and leave room around it. The Texas Education Agency’s early childhood guidance recommends balancing the amount on display to avoid visual distraction. This does not mean every room needs bare walls or the same muted palette. It means choosing what you want children to notice.
12 Classroom Decoration Ideas For Preschool Spaces
You do not need to use all twelve ideas. Start with the parts of your room that need attention, and keep the displays that already serve a useful purpose.
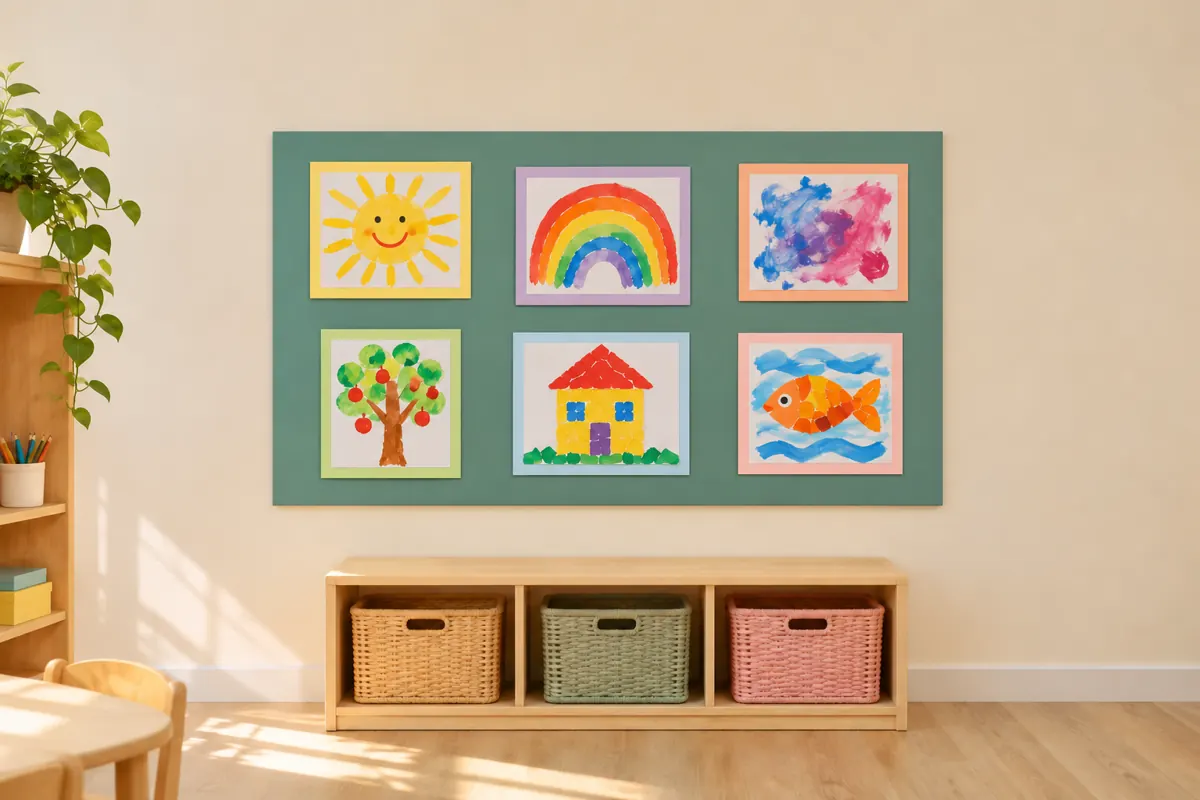
1. Make A Gallery Of Children’s Work
Give drawings, paintings, and collages a defined place instead of scattering them across every available surface. A simple background and consistent spacing can bring very different pieces together without making the work look identical.
Add a short comment dictated by the child where it helps explain the work. A few words about a drawing can give you more to discuss than a printed title chosen by an adult. Include exploration and unfinished ideas as well as polished pieces. New York City’s early childhood environment guidance also gives children’s own work a central place in classroom displays.
What You’ll Need: An existing display board, plain backing paper, children’s artwork, small paper caption cards, a marker, and fixings suitable for the board. Paper mounts are enough; individual picture frames are optional.
Try This: Lay the pieces on a table first. Use larger sheets of backing paper to give small drawings a similar amount of space to larger paintings. Arrange them in a row with space between each piece, add the caption cards underneath, then transfer the arrangement to the board. Keep spare cards nearby for the next additions.
2. Create A Small Family Photo Display
A collection of familiar faces can give children something personal to recognize and talk about. Invite families to choose a photograph they are comfortable displaying. Leave the choice open to the people who matter to each child, rather than requesting one particular kind of family picture.
Use a similar print size and a plain backing so the photographs are easy to see. If a wall display is not suitable, a classroom photo book can offer the same opportunity for conversation. Use the photographs only in the ways families have agreed to, including who can see them.
What You’ll Need: Family-approved photo prints, cardstock, a marker, and an existing display panel with suitable fixings. For the book option, use a sturdy photo album with pages children can turn easily.
Try This: Mount each photograph on its own card and add the child’s name. Ask the child who is in the picture and record the names or familiar words the child uses. During a quiet moment, invite a child to find their card and tell you something about the people in it.
3. Give Each Child A Recognizable Storage Label
Pair a child’s name with a photograph or a familiar symbol on the place used for belongings. Repeat the same marker where it is genuinely helpful, such as a drawer or work folder. Keep the lettering clear; decorative fonts can make a name harder to recognize.
When choosing labels for classroom cubbies and lockers, check the usable surface first. A label should remain visible when coats and bags are in place, and should not interfere with handles or doors. One clearly placed marker usually does more than several overlapping decorations.
What You’ll Need: A class name list, photo prints or chosen picture symbols, blank label cards, a ruler, a marker or printer, and label holders or fixings compatible with the furniture.
Try This: Make one paper sample before printing the full set. Test it on a cubby with a bag hanging in place. Once the size works, prepare the remaining labels and keep a spare blank in the same format for a new arrival. Invite each child to find their marker when putting belongings away.
4. Use Picture Labels For Shared Materials
Picture labels give shared resources a visible home. Use images of the materials in your room rather than unrelated decorative illustrations, and add a short word label. A child looking for blocks should be able to connect the picture with the objects inside.
Keep the format consistent across contenedores de almacenamiento para el aula, while allowing enough space for the picture to be clear. Check the labels after the materials are sorted. An attractive set of labels stops being useful if the contents have changed.
What You’ll Need: The containers you already use, a phone or camera, a printer, plain paper, scissors for adult preparation, and washable label pockets or another suitable way to attach the labels.
Try This: Begin with three containers, such as blocks, crayons, and play vehicles. Spread a few items on a plain surface for each photograph. Print two copies of each label: one for the container and one for its place on the shelf. At tidy-up time, use the pictures to help return both the objects and their containers.
5. Let Book Covers Decorate The Reading Corner
A few visible book covers can give a reading corner color and character without another wall poster. Mix familiar favorites with books connected to current interests, and leave the titles easy to browse.
A front-facing classroom bookshelf can help with this, but check how much of each cover remains visible in the display. Deep pockets or overlapping rows may hide the very details children use to choose.
What You’ll Need: A small selection of books, an existing front-facing shelf or stable book display, and a basket for books waiting to be put back. If you want a class-made picture, add a sheet of paper and drawing materials.
Try This: Choose four or five books to begin with, depending on the display’s capacity, and reserve the basket for returns. Invite children to draw a scene from a favorite story and use one drawing beside the books as a conversation starter.
6. Bring Existing Colors Together
Look at the furniture, flooring, and materials you already have before buying a new set of decorations. Choose a small number of colors from the room and repeat them in a few places, such as display backing, baskets, or washable covers. You can create a more consistent appearance without replacing everything.
If a classroom rug has a strong pattern, try a quieter background on the wall beside it. If the room is mostly plain, children’s artwork may provide enough color on its own. Judge the combination in the room’s daylight rather than relying only on product photographs.
What You’ll Need: Paper or fabric samples in colors already present in the room, a piece of plain display backing, and any existing baskets or washable covers you are considering reusing. Start with samples before ordering larger quantities.
Try This: If your room has a green rug and pale wood furniture, compare cream and light green backing beside them. Place a sample of children’s artwork against each option. Choose the background that leaves the work easy to see, then repeat that color in one nearby detail, such as a basket label.
7. Make A Picture Schedule Children Can Follow
A picture schedule makes the day’s sequence visible. Place it where you can refer to it together. A large calendar above adult eye level serves a different purpose from a small sequence children can follow during the day.
Keep the design simple enough to update when plans change. For a younger group, showing what is happening now and what comes next may be more useful than displaying a full day of small symbols. Introduce the pictures in conversation so their meaning is clear.
What You’ll Need: Printed activity photographs, card backing, a marker, and a pocket chart or board with secure card holders. Keep a labeled envelope or folder for cards that are not in use.
Try This: Prepare pictures for familiar parts of the day, such as arrival, play, snack, outdoor time, and going home. For a two-card version, label the spaces “Now” and “Next.” Put play and snack in those spaces, then change the cards together when it is time to move on.
8. Show Classroom Jobs With Clear Pictures
A classroom jobs board shows how children can help with everyday tasks. Keep it separate from a reward chart or a public ranking of behavior.
The board works best when the jobs are part of the daily routine. If a task rarely happens or always needs an adult to do it, change the task rather than adding more decoration to the board.
What You’ll Need: A small board or pocket chart, photographs of classroom tasks, child name or photo cards, and an envelope for spare cards. You can make the task pictures with a phone and printer.
Try This: Begin with two or three jobs you can demonstrate, such as returning books or setting out napkins. Put each job picture beside a space for a name card. Show how to do the task, add the helper’s card, and move it when the turn changes. The board gives you a place to check who is helping today.
9. Build A Display Around One Class Question
Turn an interactive bulletin board into a place for a question the class is exploring. You might ask which objects will roll, where a puddle goes, or what makes a shadow. Add children’s predictions, drawings, or comments as the investigation develops.
Keep the question visible and make room for different answers. A useful display can show that an idea changed after trying something. You do not need to cover every gap with a heading, border, or premade worksheet.
What You’ll Need: A display board, a question card, blank drawing paper, markers, and space for photographs or dictated comments. For “Which objects will roll?”, gather a few age-appropriate classroom objects with different shapes, such as a large ball, a wooden block, and a play vehicle.
Try This: Divide the board into “Our Predictions” and “What Happened.” In the first section, add a drawing of each object and record whether children think it will roll. Test the objects on the same surface, then add the results to the second section using photographs or children’s comments. Leave both records visible so children can compare them.
10. Display Something From The Local Natural World
Build a display around something children have noticed outdoors. Choose a subject you can return to together, such as a tree by the entrance or plants in a garden bed, so the display stays connected to familiar surroundings.
For a small nature display, give each item enough space to be noticed. If you include real leaves, seeds, or other natural objects, check that they are suitable for the age group before placing them within reach. Use photographs for anything fragile, difficult to clean, or unsuitable for handling.
What You’ll Need: A camera or phone, printed photographs, date cards, drawing paper, and a small display surface. If you include suitable natural objects, add a shallow tray to keep the collection together.
Try This: Choose one tree children can see regularly. Photograph it from the same spot on different days, add dates, and arrange the prints from earliest to latest. Place a child’s drawing beside the photographs. You can use the display to notice new leaves, bare branches, or other local changes without buying a seasonal decoration set.
11. Add Children’s Signs To Pretend Play
Menus, tickets, shop signs, and appointment cards can become part of both the decoration and the play. Invite children to draw or dictate what the area needs, then place the signs where they will be used.
Follow the play that is happening rather than decorating for an elaborate theme before children have had a chance to contribute. A sign can change as the play changes; it does not need to become a permanent part of the room.
What You’ll Need: Cardstock, folded paper, crayons or markers, a small notepad, and a suitable place to attach or stand the signs. Keep the existing pretend-play materials; you do not need a new set of props to add useful print.
Try This: For a pretend café, fold a sheet into a menu and invite children to draw the food already available in the play area. Add an “Open” sign to the counter and leave the notepad for taking orders. Watch which signs become part of the play before making more.
12. Put Letters And Numbers Where They Are Used
Choose alphabet and number displays that children can use during an activity. A small reference close at hand is often more practical than a large decorative chart across the room.
Check that the type is easy to read and the quantities are accurate. Keep the reference limited to what children need for the activity; you can introduce more cards as their interests and familiarity grow.
What You’ll Need: Blank cards, a marker or printer, photographs of familiar objects, and a small card holder. For a writing reference, prepare name cards in clear lettering. For counting, pair each numeral with a photograph showing the matching number of objects.
Try This: Make a small set of cards showing one to five blocks, with the numeral beside each photograph. Stand them next to the blocks and invite children to build a matching group. In the writing area, keep the name cards where children can look at them while making a card or labeling a drawing.
Keeping Displays Useful Through The Year
Review decorations when their purpose changes. You may want to take down a finished investigation, make space for new work, or remove information that no longer matches the room. There is no need to replace every display simply because a month has passed.
Separate the parts you can reuse from the parts you want to change. Keep useful backing panels and label holders, then replace the content. Store reusable pieces by where they belong so the next update does not begin with a search through mixed decorations.
Include display materials in your normal room checks. Look for damaged edges, loose fixings, and surfaces that are difficult to clean. Follow the mounting instructions for the display system, keep access routes clear, and avoid additions that obscure supervision. A decorative change should not make everyday use of the room more difficult.
Preguntas frecuentes
How can you decorate a shared classroom without painting the walls?
Agree on which surfaces each group can use and when they need to be cleared. Portable display boards and removable inserts in existing holders can give each group its own display space. Confirm the permitted fixing methods before choosing adhesive products; a removable label does not guarantee that a product will leave every surface undamaged.
What if a child does not want their work displayed?
Offer another way to keep it, such as a personal folder or a book the child can choose to share. You can invite participation without making public display a requirement. Ask again when there is new work to consider, rather than assuming one decision applies to every piece.
Should every classroom in the same setting have matching decorations?
You can use a few shared conventions, such as the style of room signs or the format of family information, while allowing each class to look different. The same purchased theme across every room may be less useful than displays that reflect each group’s experiences. Decide what needs consistency across the setting and leave the remaining choices to each classroom team.
Conclusión
Start with one area that would benefit from a change and see how children use it before extending the idea. If your plans involve new display furniture, storage, or reading-area pieces, Xiair World can help you consider options alongside the room’s dimensions and age group.